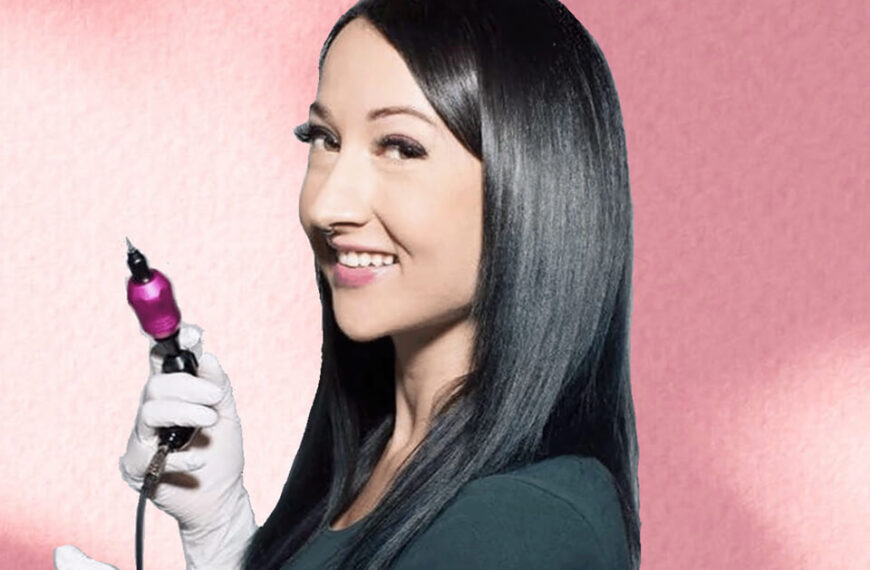
For this guide, we consulted Mary Jones, PMU artist at Star Beauty Salon, to clarify the microblading process, including what to expect before, during, and after the treatment, as well as the associated costs, potential risks, and tips for choosing the right artist.

- What is Microblading?
- The Microblading Process
- Consultation
- Preparation and Mapping
- Numbing
- Microblading
- Cleaning and Aftercare
- Is Microblading Painful?
- The Healing Process
- The Touch-up Session
- Aftercare Instructions
- How Long Does Microblading Last?
- The Cost of Microblading
- Contraindications for Microblading
- Choosing a Microblading Artist
Microblading is one of the most popular cosmetic tattooing procedures today. It’s revolutionized eyebrow grooming by offering a semi-permanent solution to sparse, uneven, or missing brows.
What is Microblading?
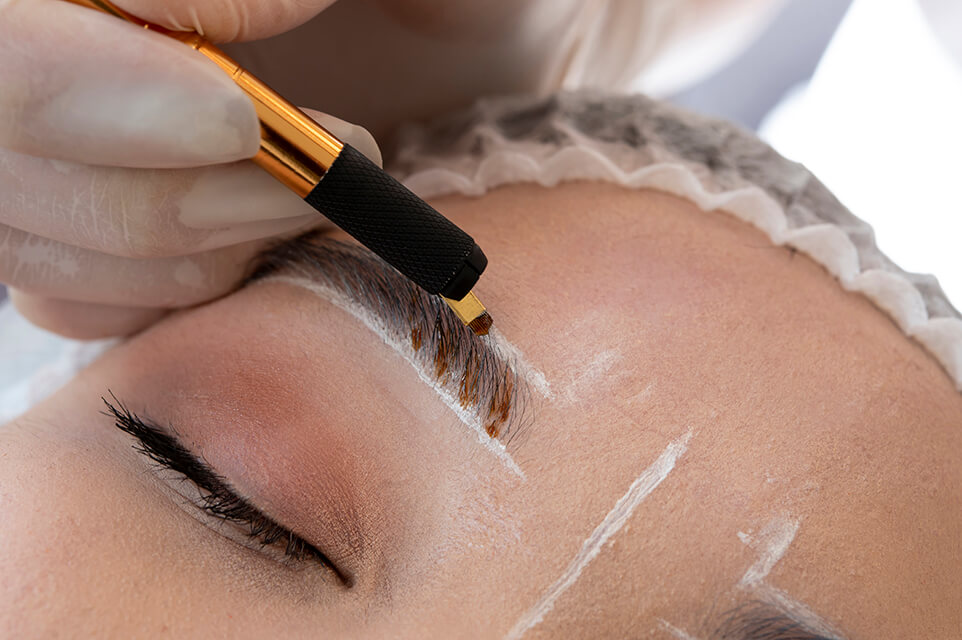
Microblading is a semi-permanent makeup technique used to create the illusion of fuller, more defined eyebrows. The process involves using a specialized handheld tool, often referred to as a microblade, to make small, hair-like incisions in the skin and deposit pigment into them. These tiny strokes resemble natural eyebrow hairs and provide a natural, fuller look.
Unlike traditional eyebrow tattoos, microblading only affects the outer layers of the skin, which means the results aren’t permanent.
Mary Jones, clarifies that “Microblading provides a more natural look compared to traditional eyebrow tattoos, which often appear too bold or artificial”.
With Microblading, over time, the pigment fades, and the strokes become lighter. This fading is expected and desirable as it allows for adjustments as your face changes with age or style preferences evolve.
The Microblading Process
If you are considering microblading, understanding the steps involved can help ease any anxiety about the procedure. Here’s what you can expect from start to finish:
Consultation
A consultation is required before the actual procedure. During this session, the microblading artist will discuss your desired eyebrow shape and fullness, explain the process, and review any health conditions or skin sensitivities that might affect the treatment. This is a good time to ask questions and raise any concerns you might have.
Additionally, many artists perform a patch test to ensure that you are not allergic to the pigments or numbing creams that will be used during the process.
Preparation and Mapping
On the day of the procedure, the artist will first clean the area around your brows and begin the process of “mapping” your new brows. This involves measuring your facial features to determine the ideal eyebrow shape that will suit your face. The artist will then outline this shape, and you can give feedback before the actual microblading begins.
Numbing
After mapping, a topical anesthetic is applied to the area to minimize discomfort during the procedure. The numbing cream is usually left on for about 15-20 minutes to take effect.
Microblading
Once the area is numb, the artist will begin the microblading process. The microblade is dipped into the chosen pigment, and small, hair-like strokes are drawn on the skin. The blade penetrates only the upper layers of the skin, making this a semi-permanent procedure. Depending on the desired fullness and the client’s skin type, the artist may do one or two passes over the brows. Each stroke is meticulously placed to mimic the natural direction, length, and thickness of your eyebrow hairs, giving the brows a natural appearance.
Cleaning and Aftercare
After the microblading is complete, the artist will clean the area and apply an ointment to protect the new brows. You’ll also be given detailed aftercare instructions to ensure proper healing. It’s common to be provided with an aftercare kit, including a healing ointment and instructions for cleaning the area.
Is Microblading Painful?
Pain is often a concern for those considering microblading. However, most clients report that the procedure is not painful due to the use of numbing cream. Some clients describe the sensation as mildly uncomfortable, similar to the feeling of a scratch, while others might experience more sensitivity. It’s important to communicate with your artist during the procedure if you feel too much discomfort, as additional numbing cream can be applied.
The Healing Process
Healing from microblading takes about four to six weeks, during which the eyebrows may go through several stages. Initially, the brows will appear darker and more intense than expected, which is normal. Over the next few days, the brows may begin to scab and peel, and the pigment may lighten considerably.
Here’s a general breakdown of the healing process:
Day 1-3: Brows look dark and bold; some redness may be present.
Day 4-7: Scabbing begins, and the brows may start to peel. It’s important not to pick at the scabs, as this can cause pigment loss.
Day 8-10: Scabs will continue to fall off, and the brows may look patchy
Day 11-14: Peeling subsides, and the brows will appear much lighter than expected.
Week 4-6: The pigment begins to return, and the final results become visible.
Following your artist’s aftercare instructions during this time is crucial to ensure proper healing and the best possible results.
The Touch-up Session
After the initial microblading procedure, the client typically needs to see the artist again for a touch-up session. This follow-up appointment is an essential part of the microblading process. Here’s a general timeline:
- Initial healing period: 4-6 weeks
- Recommended time for touch-up: 6-8 weeks after the initial procedure
The touch-up session is necessary because:
- The skin may not retain all the pigment from the first session.
- The client can assess the healed results and request any adjustments.
- The artist can perfect the shape and color.
- It allows for filling in any gaps or addressing any inconsistencies.
“The touch-up allows the artist to perfect the shape and color and fill in any gaps that may have appeared during healing.” says Mary Jones.
Aftercare Instructions
Proper aftercare is essential for the success of your microblading treatment. Neglecting aftercare can lead to poor pigment retention, infections, or even scarring. Here are some general aftercare guidelines:
Keep the area dry: Avoid getting your brows wet for at least a week after the procedure. This means no swimming, saunas, or sweating.
Avoid makeup: Don’t apply makeup to the brow area while it’s healing to prevent infection.
Avoid picking at scabs: Let the scabs fall off naturally to avoid pigment loss.
Apply aftercare ointment: Your artist may recommend a healing ointment to apply regularly.
Avoid sun exposure: Protect your brows from direct sunlight to prevent premature fading.
After about two weeks, you can return to your normal skincare and makeup routine, though it’s important to avoid exfoliants or harsh products on the brow area for the first month.
How Long Does Microblading Last?
One of the most common questions about microblading is how long it lasts. Typically, microblading results last between 12-18 months, though this can vary depending on skin type, lifestyle, and aftercare. For example, those with oily skin may experience faster fading due to the natural production of oils, which can break down the pigment more quickly.
As Mary Jones explains, “This procedure is incredibly convenient, allowing you to wake up with perfect brows every day for more than a year.”
The results will gradually fade over time, and yearly touch-ups are recommended to maintain the brows’ shape and color.
The Cost of Microblading
The cost of microblading can vary depending on the location, the artist’s experience, and the complexity of the treatment. On average, microblading costs between $400 and $800. This price usually includes the initial procedure as well as a follow-up appointment for the first touch-up. Additional touch-ups may be charged separately.
It’s essential to choose an experienced and certified artist to ensure the best results, even if their prices are higher. Going to a less experienced or cheaper artist can lead to unsatisfactory results or complications.
Risks and Complications
Although microblading is generally considered safe, there are some risks and potential complications to be aware of:
Infection: If proper sanitation isn’t followed, there’s a risk of infection during or after the procedure.
Allergic Reactions: Though rare, some clients may experience an allergic reaction to the pigments used. This is why a patch test is often recommended before the procedure.
Scarring: Improper technique can lead to scarring, especially if the artist applies too much pressure or if the client picks at scabs during healing.
Uneven Pigment: Some areas may not retain pigment as well as others, leading to patchiness. This is usually corrected during the touch-up session.
It’s important to disclose any medical conditions or medications you’re taking to your artist, as these could affect your suitability for microblading.
Contraindications for Microblading
Not everyone is a good candidate for microblading. Individuals with the following conditions should avoid the procedure:
– Pregnancy or breastfeeding.
– Certain autoimmune diseases.
– Active skin conditions like psoriasis or eczema around the brow area.
– Recent Botox or filler injections (must wait at least two weeks).
– A history of keloid scarring.
– Use of blood thinners or Accutane (must be off Accutane for at least six months).
If you have any medical conditions or are taking medications that could affect your healing process, consult with your doctor and microblading artist before proceeding.
Choosing a Microblading Artist
The success of your microblading treatment heavily depends on the skill and experience of the artist. When choosing a microblading technician, consider the following:
1. Certification and Training: Ensure the artist is certified and has undergone proper training in microblading techniques.
2. Portfolio: Look at before-and-after photos of the artist’s previous work to assess their skill level.
3. Reviews: Read reviews from previous clients to get a sense of the artist’s reputation and the quality of their work.
4. Sanitation Practices: The artist should follow strict hygiene protocols to minimize the risk of infection.
It’s always a good idea to have a consultation with the artist before committing to the procedure to ensure that you feel comfortable and confident in their abilities.
If you’re considering microblading and want to learn more, schedule a consultation with Mary Jones to discuss your options.

